Homebrew paddles by LA6AKA
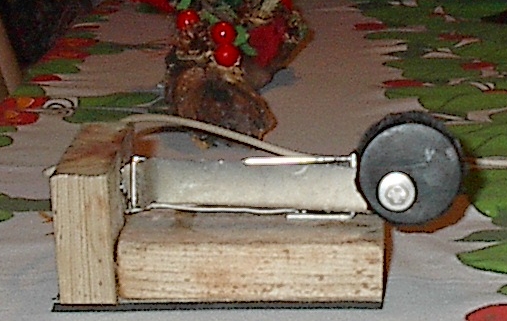
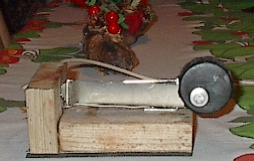
 Here is a set of lo-tech morse code paddles
that I built during a couple of days between Christmas and New Year. Don't
build them yourself! They turned out to be really cruddy. The arrangement
with wood screws at the back really wasn't stable enough to make them
usable. In fact, some of the guys at the radio club mistook one of the detached paddle levers
for rubbish, so they threw it away. Consequently, I only have half of it
left.
Here is a set of lo-tech morse code paddles
that I built during a couple of days between Christmas and New Year. Don't
build them yourself! They turned out to be really cruddy. The arrangement
with wood screws at the back really wasn't stable enough to make them
usable. In fact, some of the guys at the radio club mistook one of the detached paddle levers
for rubbish, so they threw it away. Consequently, I only have half of it
left.
At the very least, compare with designs such
as PA0CMU's
PCB paddle,
or K5BCQ's
paddles with pneumatic fittings, before you begin to try to muster up
parts to go with my design.
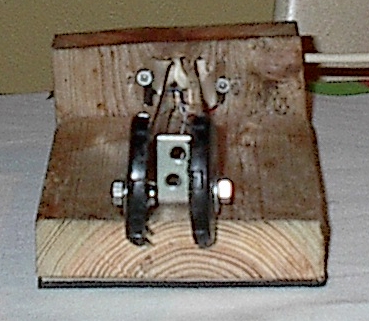
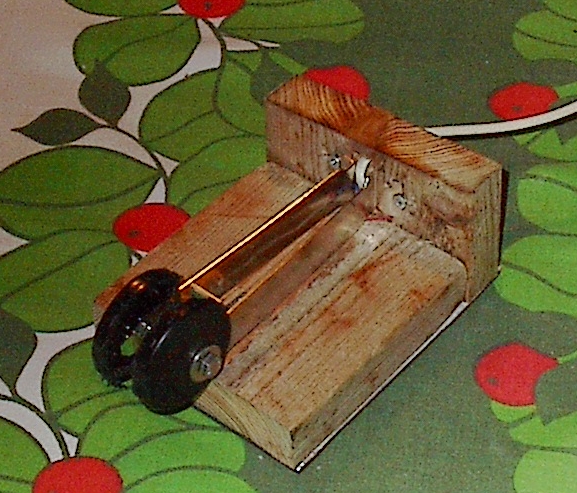
As you can see, there are no distance adjustment screws. To adjust the
distance (and tension), simply detach the lever (expansion port cover),
bend it a little, and reattach it. Then repeat the procedure on the
other side, if necessary.
How to build it
I have used the following materials:
- 2 pieces of wood
- 2 expansion card slot covers (PC clone)
- 2 plastic lids from empty cans of Ilford Ilfospeed photo
chemicals
- 2 5 mm bolts
- 2 5 mm nuts
- 2 5 mm washers
- 1 small bracket
- 4 wood screws
- 1 3-wire cable
- 1 piece of rubber from an old mouse mat
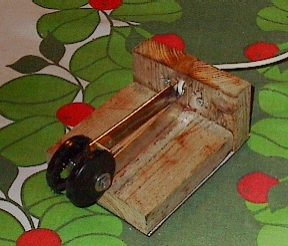
First, cut up two pieces of wood of suitable size, as shown on the
photos. Find out how to place the levers and the bracket, and mark it
with a pencil.
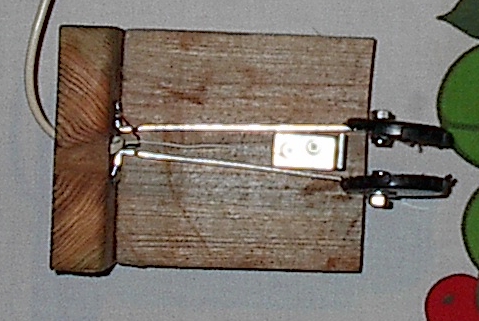
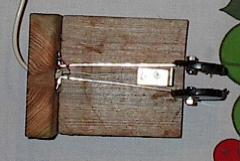
Drill 3 holes through the smallest piece of wood (the backpiece), one
below another, for the cable. The idea is to thread it out on the
backside, then in, then out again, to secure it firmly. The holes should
be between the pencil markings for the levers, but large enough to make
the cable fit.
Now glue the two wood pieces together. After it's dried, attach the
expansion card slot covers with wood screws, one in each of the holes
that "point outwards". You don't need to screw them in very tightly, as
the levers will bend outward, and make the distance unnecessarily
large.
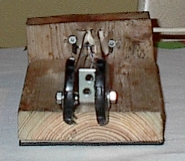
Then attach the bracket that is going to serve as the contact point.
It should have exactly the same distance from each lever, and be exactly
parellel with the backpiece. Then connect the individual wires of the
cable to the bracket, and to each of the levers. You can solder them on,
or just make loops around the screws. If you do the latter, as I did,
it's a good idea to put them between the metal and the wood, instead of
between the metal and the heads of the screws. Otherwise, the screws
might cut off the ends of the wires.
Saw off the tops of the lids. Keep the tops, and throw away the parts
with the threading. Drill a hole in them at about the same place. I used
a small ring inside of the lids as reference, but you probably won't
find exactly the same type of lids as I did. Note that the holes at the
end of the expansion card slot covers have a diameter of slightly
less than 5 mm. It is therefore necessary to drill them
up to enlarge them. Alternatively, go for 4 mm bolts to attach the
plastic lids.
Well, that should be all for now. Stay tuned for the next episode:
building an electronic keyer!
 |
|
 |
|
 Here is a set of lo-tech morse code paddles
that I built during a couple of days between Christmas and New Year. Don't
build them yourself! They turned out to be really cruddy. The arrangement
with wood screws at the back really wasn't stable enough to make them
usable. In fact, some of the guys at the radio club mistook one of the detached paddle levers
for rubbish, so they threw it away. Consequently, I only have half of it
left.
Here is a set of lo-tech morse code paddles
that I built during a couple of days between Christmas and New Year. Don't
build them yourself! They turned out to be really cruddy. The arrangement
with wood screws at the back really wasn't stable enough to make them
usable. In fact, some of the guys at the radio club mistook one of the detached paddle levers
for rubbish, so they threw it away. Consequently, I only have half of it
left.